With our first home finally done and completed, I’ll be adding more posts on this topic over the coming months, so do keep a lookout for those!
2020 threw a spanner in the works when Singapore entered the Circuit Breaker, which resulted in the last leg of our home renovations to be delayed for several months. With our renovation journey finally completed, I thought I’ll kick off this series with a few key tips on how we reduced our renovation costs for a start!
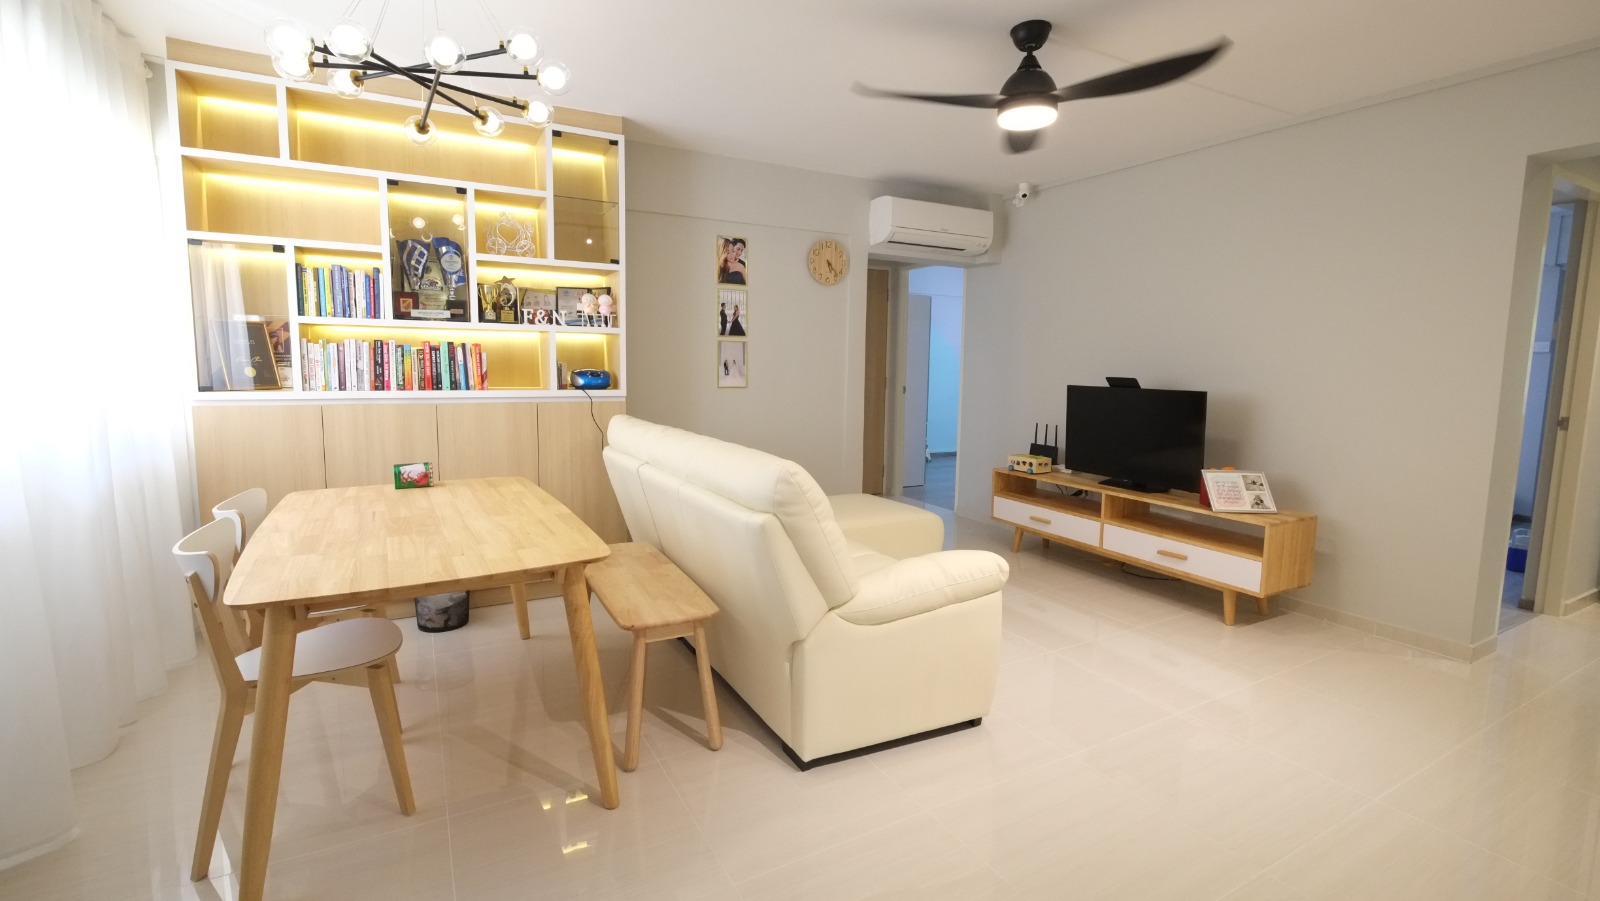 |
| Our first home. |
1. Draw up your renovation budget.
Your budget will vary based on the age of your house (newer, BTO flats or a resale flat that just MOP-ed can obviously cost you so much lesser in renovations), your design and materials used. If you’re buying an older resale flat like we did, you may need to factor in additional costs of rewiring the electrical circuits, pipe replacements, etc.
We did a few things to arrive at an estimated budget:
- Check online to get an idea of rough renovation costs for a similarly-sized resale flat like ours
- Get a quotation from 3 – 4 ID firms
- Break it down into renovation vs. furniture costs
2. Decide if you will go for an ID or via a direct contractor.
The latter will be cheaper, but you’ll have to be reasonably design-savvy in order to pull it off. And having gotten a quote from a direct contractor as well, we felt the difference was worth paying for.
We deliberated for a long time over this, but eventually went with an ID firm (Interior Signature Studio) because we didn’t have the luxury of time to keep checking on the subcontractors in person and ensuring the quality of their work. In fact, during the whole process, our ID was on-site almost every other day, whereas we only had time to visit less than 5 times throughout!
No regrets, because our ID team contributed in many ways that added value to our renovation process, and were instrumental during the touch-ups as well.
3. Opting for vinyl over tiles.
Vinyl flooring and epoxy are much cheaper than tiles, but we eventually decided on tiles for the wet areas (toilets, kitchen and living room) and went with vinyl flooring for all of the rooms + storeroom.
This saved us a considerable sum of money vs. if we had done 100% tiles.
4. Do you REALLY need a feature wall?
I’ll be the first to admit that I never quite understood the hype over having a feature wall. Yes, it looks nice, but what if your budget doesn’t allow for it?
We considered whether to use wallpaper for the feature wall instead of tiles, but eventually ditched the idea completely and let our ceiling-to-floor bookshelf do the talking as the focal piece in our living room. As a bookworm, I LOVED this.
For the children’s room, we opted for paint to create a feature wall instead, and that reduced our costs significantly as well.
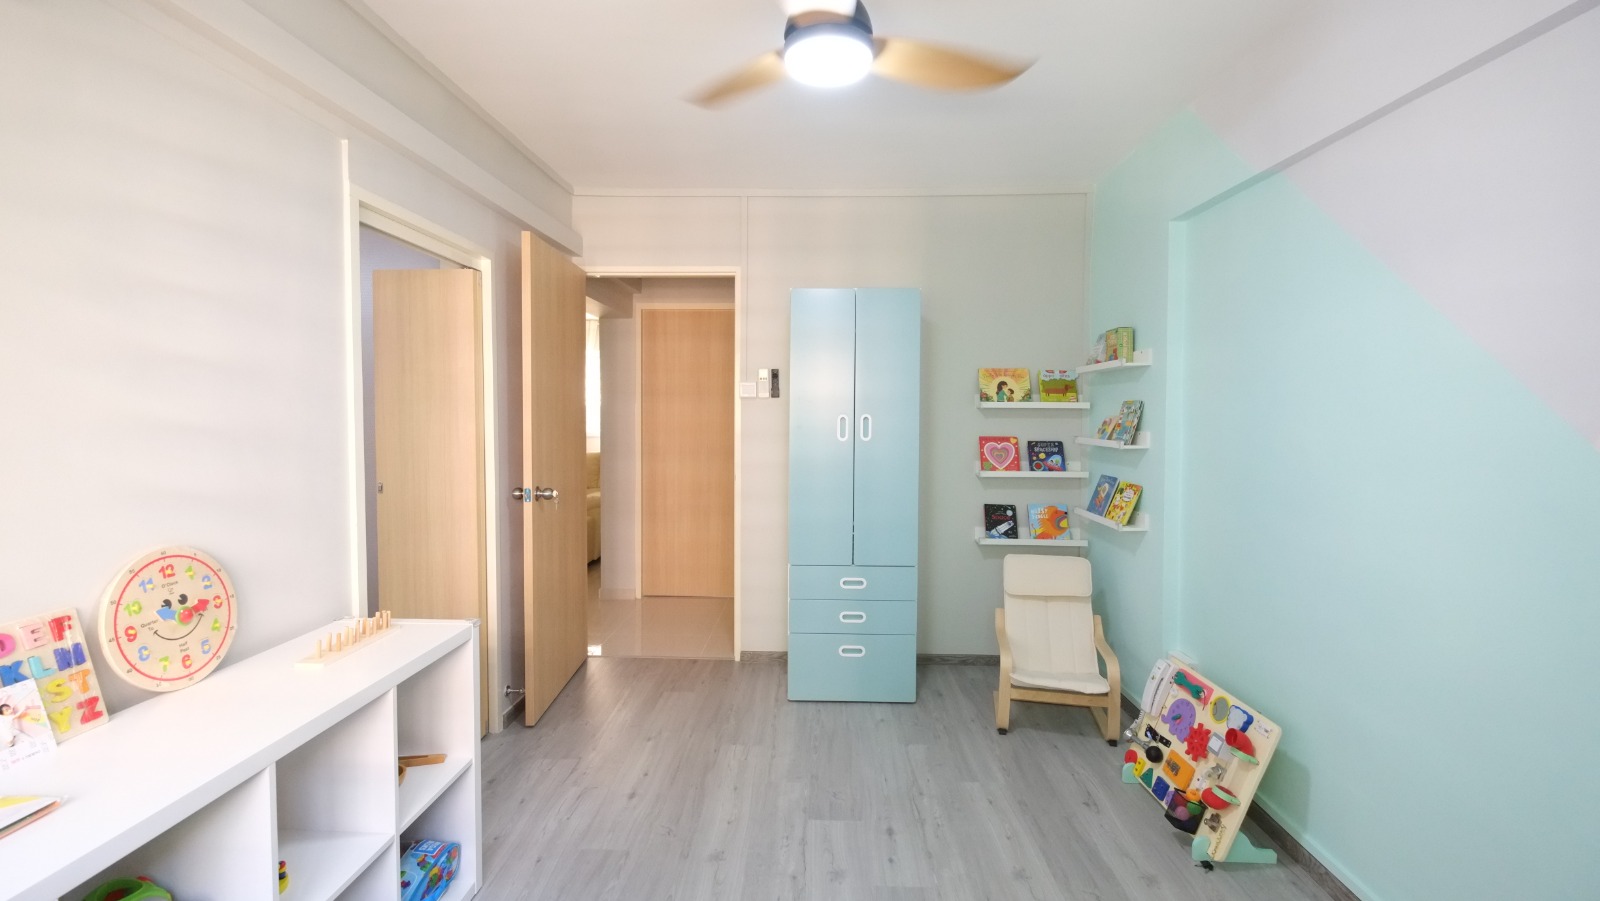 |
| We used paint to create the feature wall in Nate’s room, and IKEA furniture pieces which would allow us the flexibility to easily transform this room as Nate grows up. |
5. Replace built-in carpentry with furniture.
Carpentry costs are one of the main reasons for expensive renovation quotes, so if your ID is suggesting a lot of carpentry work, you might want to be wary.
Luckily for us, our ID shared the same sentiments, and so we opted for carpentry only in the following areas:
- A ceiling-to-floor feature bookshelf in the living room
- Kitchen cabinets
- Vanity in the master bathroom (due to lack of space)
- Shoe cabinet behind the door (due to the odd shape and size)
- A suspended bookshelf in the study room
This reduced our original quote by close to 15%, and if I hadn’t insisted on the feature bookshelf, it would have been even cheaper 😛 but you can’t argue with a bookworm!
Another built-in feature we eliminated was the oven as it would cost us a lot more to buy and maintain, so we opted for a portable oven instead.
6. Avoid false ceilings and cove lights.
While these look gorgeous in designs, the cost didn’t make sense for us to go with it, and cleaning would be a b*tch, so we eliminated them completely.
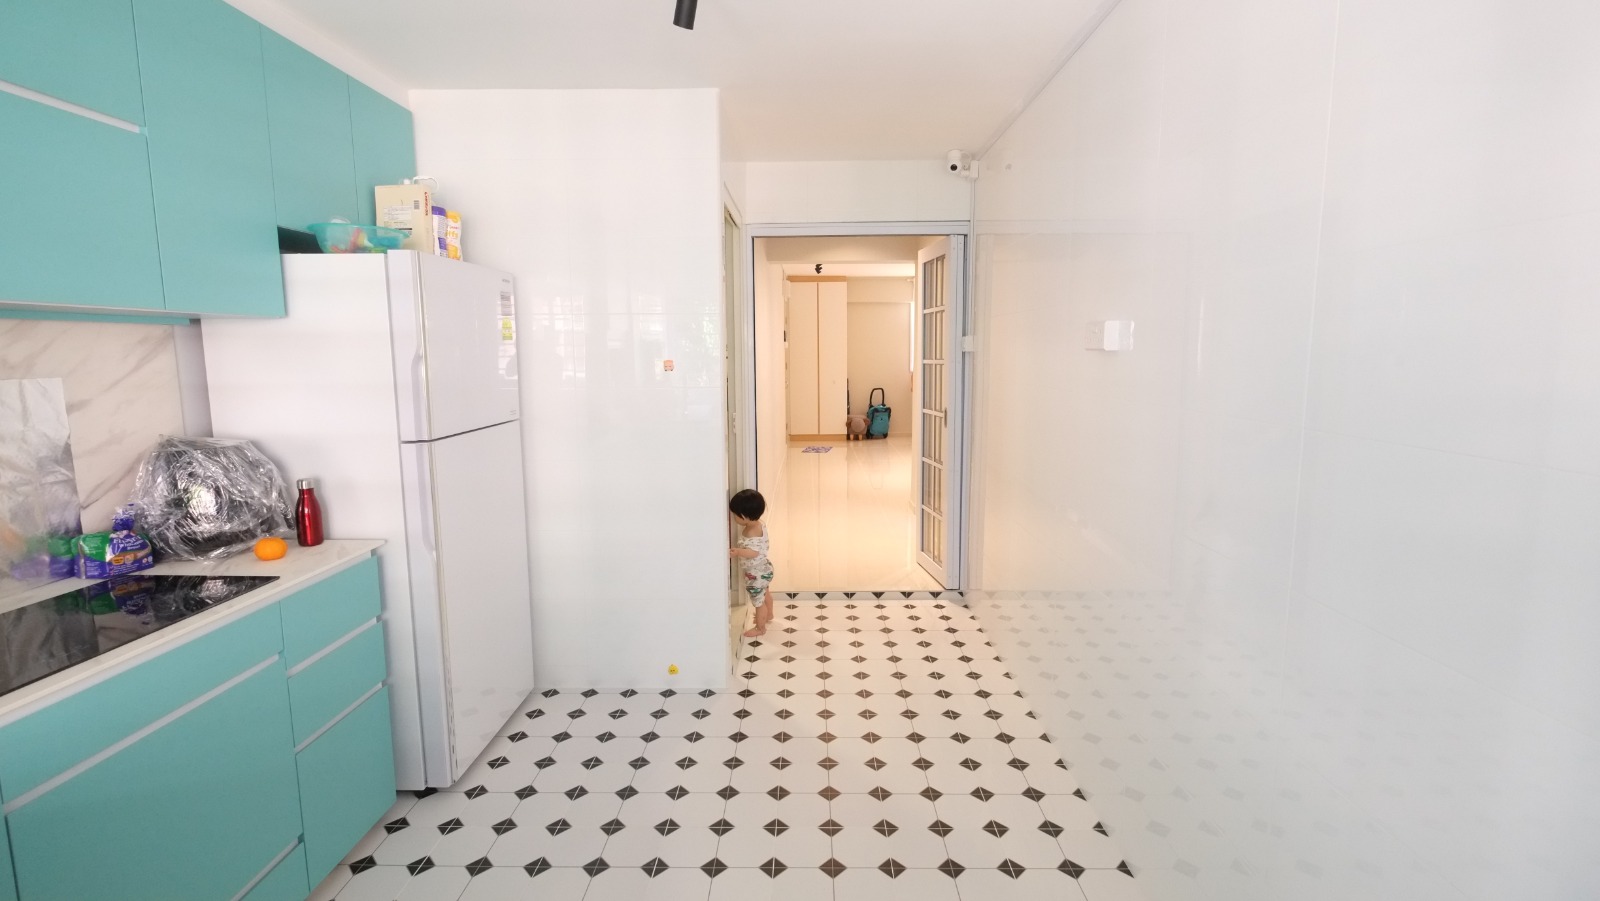 |
| Check out the sleek (marble-like) compact tabletop by EDL and the gorgeous backsplash! |
7. Using EDL Compact instead of real marble for our kitchen
I had a very specific design in mind for my kitchen (elegant white marble with tiffany cupboards), but marble is not only costly, it is also difficult to care for given its porous nature which is easily prone to stains and scratches.
Thankfully, we were introduced to EDL, who offered us a far more affordable solution in the form of their 10mm EDL Compact Marble – this had a homogeneous white matching core (the first, and only one in the market) which had the sleek and clean look I was going for. In addition, they had a 6mm option for us to use as the backsplash, so we could pull off a coordinated look throughout.
In terms of durability, the EDL Compact Marble is even hardier than real marble, and is resistant to moisture, high pressure, heat, scratches and stains! We’ve been using just a damp cloth with warm water to clean our countertop, and the maintenance is so fuss-free that I truly love it. The best part? I could achieve the modern, elegant marble design I had in mind at a mere fraction of real marble cost 😀
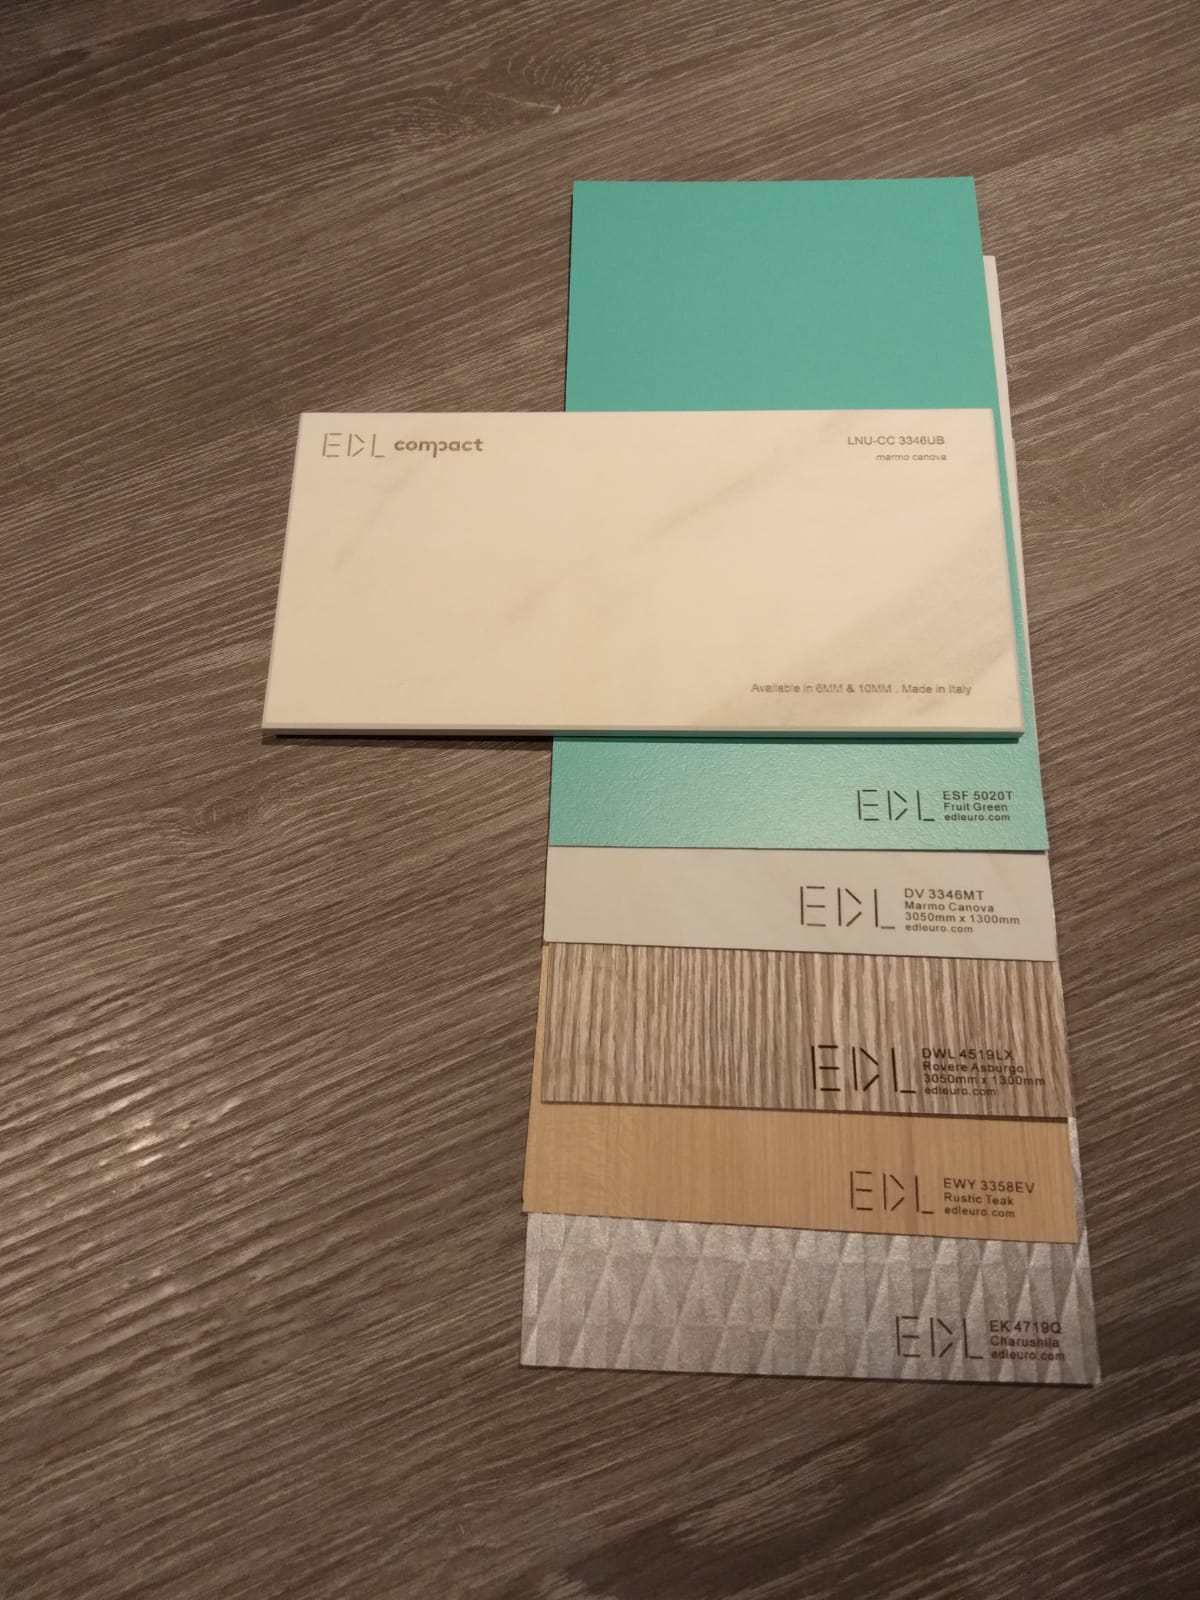 |
| Our choice of EDL Compact (white marble) and laminates. |
8. Using laminates instead of real wood
My parents’ house heavily featured wooden furniture which I loved, but the issue was that over the years, termites feasted on them and we had to replace most of our wooden furniture in the end. It was not only gross, but also extremely inconvenient because there were so much rotten wood and wood chippings all over the floor.
So when it came to my own house, as much as I wanted a wooden, MUJI-style look, we decided to opt for laminates instead of real wood for the carpentry.
We went with EDL laminates, because some of the other suppliers we explored only sold theirs in standard 4 x 8 ft sizing (the size of a HDB door), which meant that we would have ugly joint lines for our ceiling-to-floor carpentry (bookshelf and master bedroom wardrobe). EDL had 10 ft laminates, which solved this problem for us, and their prices were extremely competitive so it was a no-brainer.
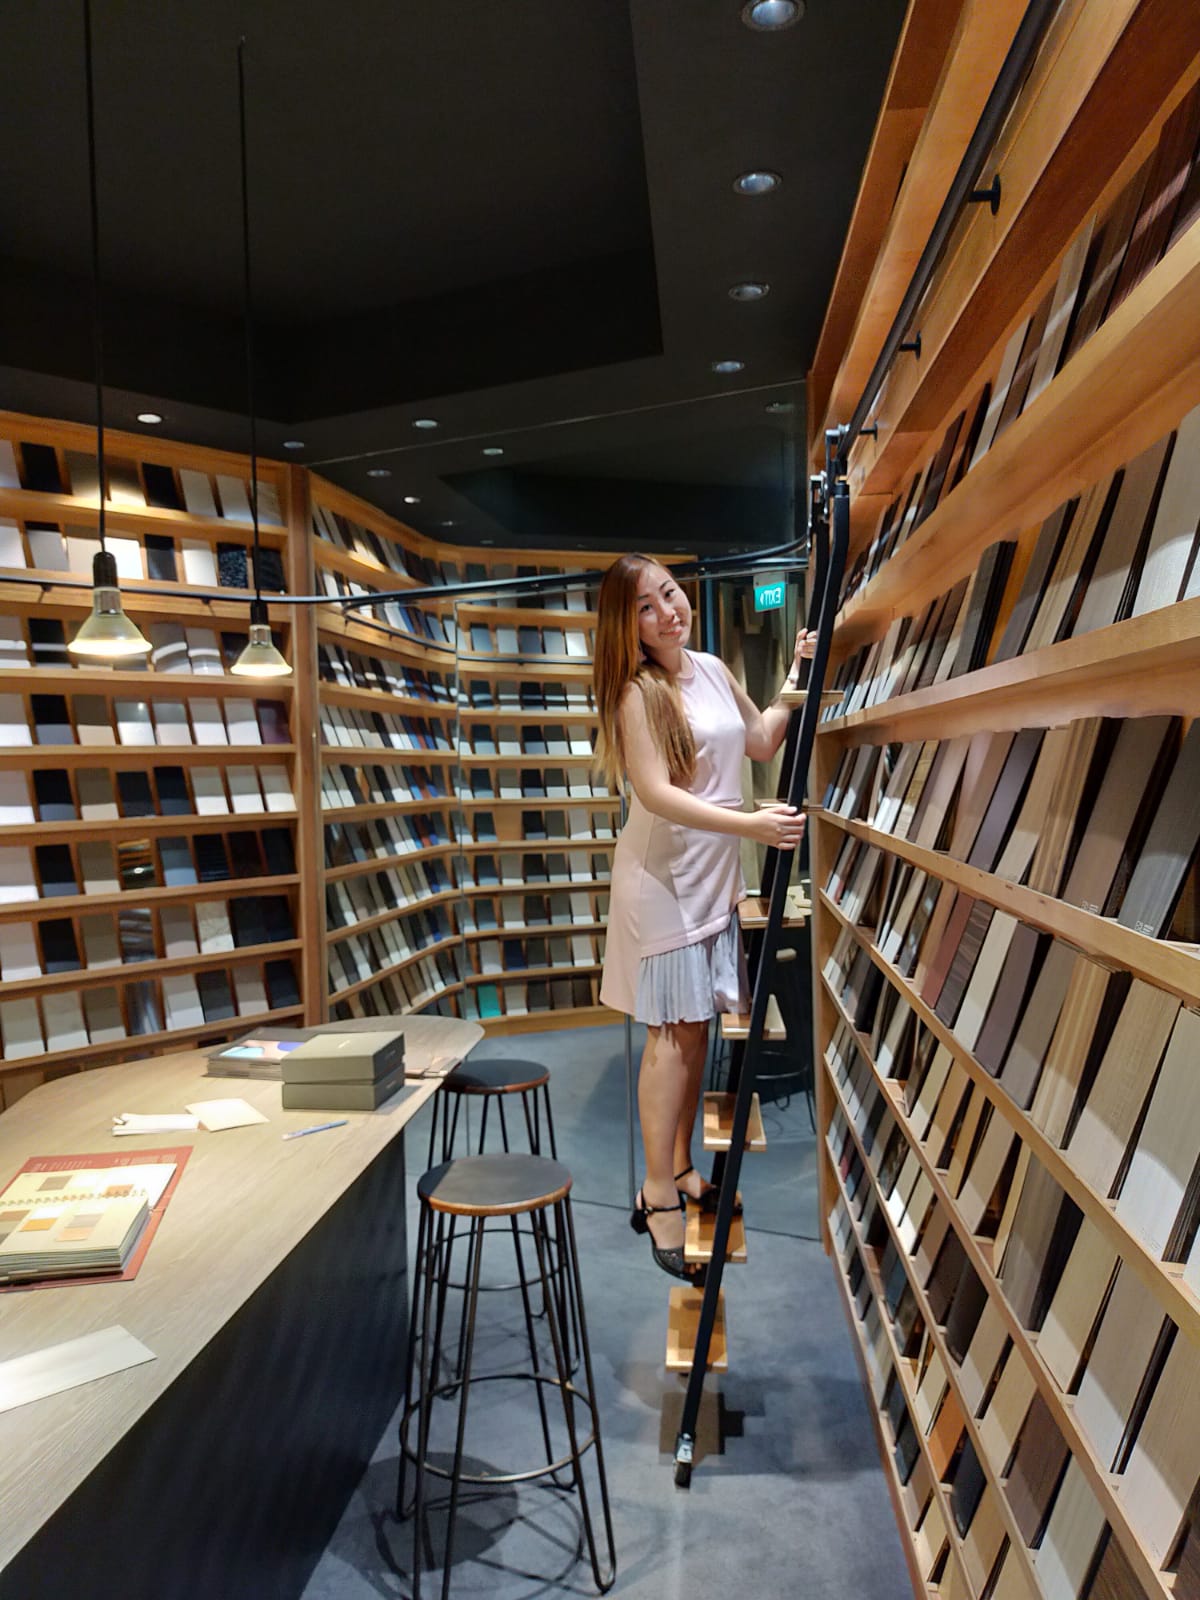 |
| The EDL showroom has so many choices of laminates that we took 2 hours just to decide! |
9. Buy bathroom accessories and other items from Taobao.
During the 11.11 sale (back in 2019), I carted out quite a lot of items from Taobao. Here’s a quick list of some Taobao items in our house:
- Dressing table
- $9 x 2 bathroom towel racks
- A $60 black-and-gold rain shower
- 2 x toilet roll holders
- A $42 white-and-gold bathroom tap (we paid only $38 for it, and saw the same piece retailing for $280+ at a local shop)
- $64 for 2 x Curtain blinds (liaised with the seller for customization of width and length to fit our windows)
Unfortunately, I didn’t manage to save the Taobao links as it was from over a year ago, so apologies that I couldn’t share it here! There were minimal delivery fees as my husband and I were physically in China, so we brought it back on the airplane with us 😀
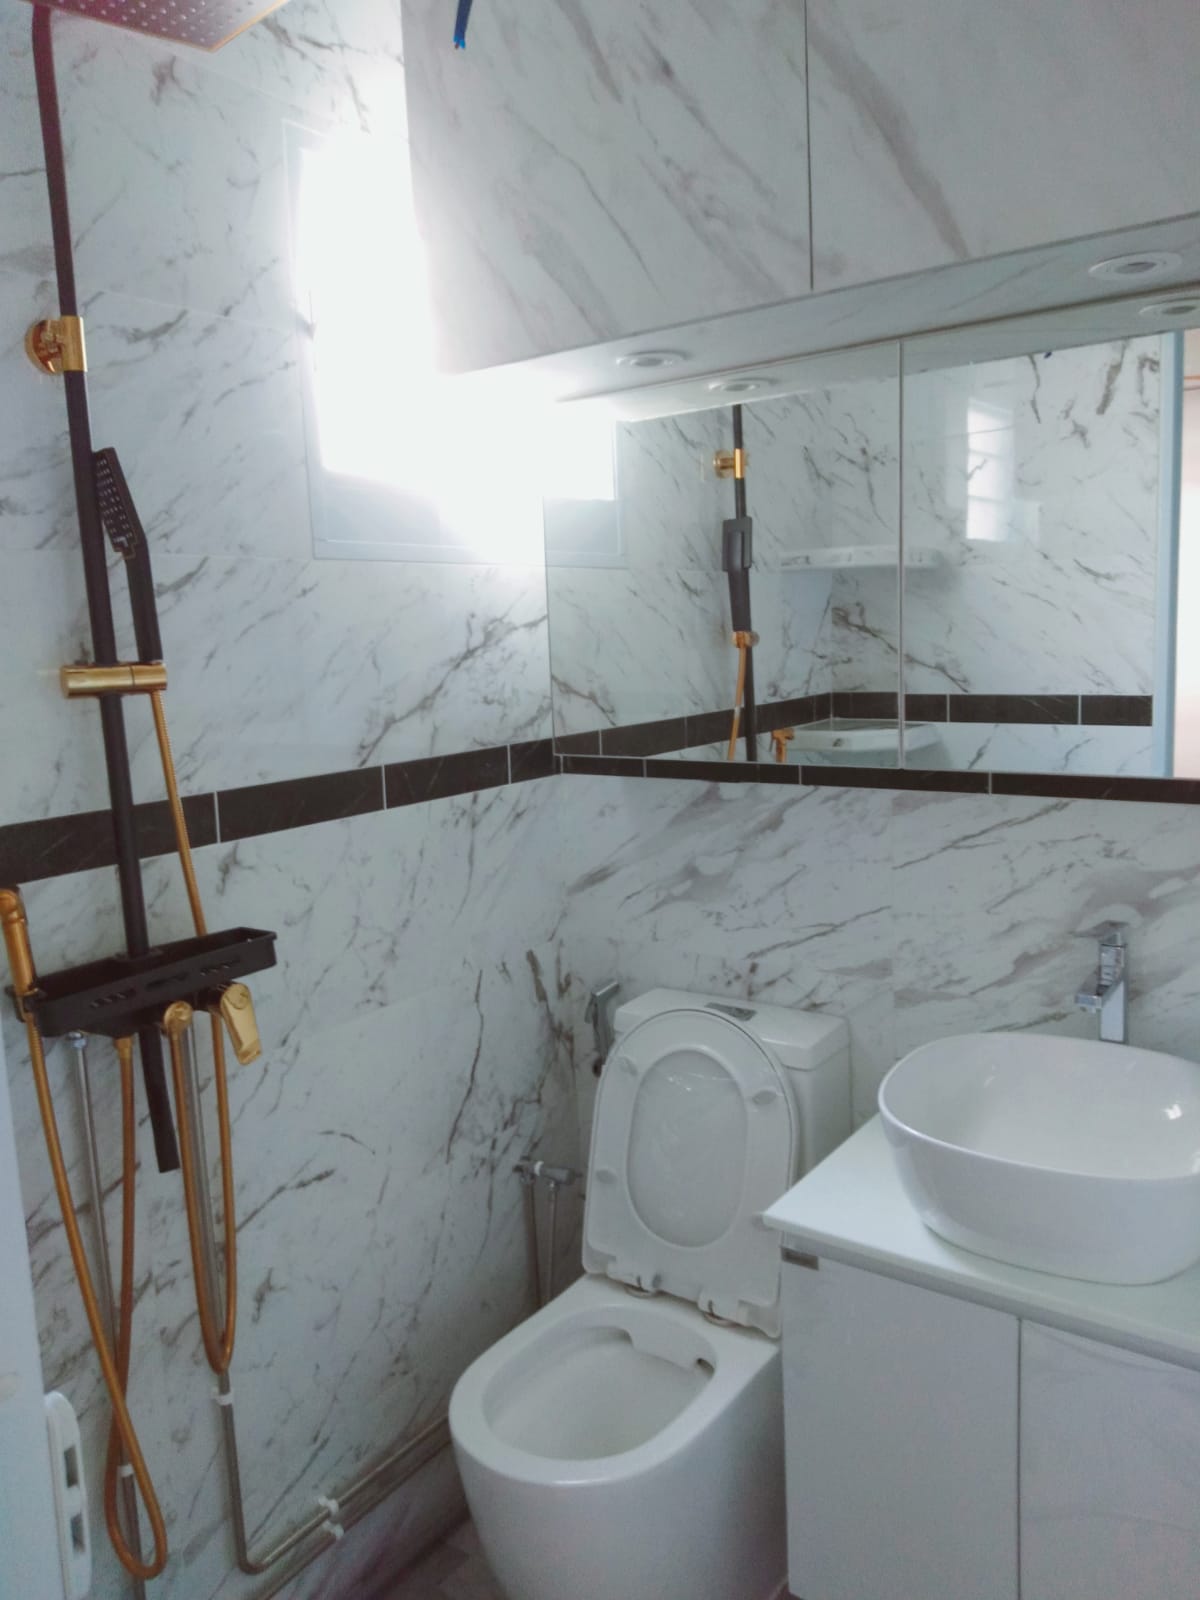 |
| Our rain shower set from Taobao. |
10. Buy cheap furniture from IKEA and Johor Bahru
We bought the following from JB, and our ID even followed us on the trip to ensure it would fit the design theme:
- $480 Wooden dining table + TV console set (this was a splurge by my husband)
- $700 Leather sofa
- Curtain rods (which our DIY-pro uncle helped us to install)
- Sheer daytime curtains
- Billy bookshelf
- Stockholm mirrors
- Micke work desk (where we WFH)
- Rigga clothes rack (because we have too many clothes, lol)
- Stuva wardrobe (Nate’s clothes)
- Kallax shelves (Nate’s books and toys)
- Mosslanda picture ledges (to create Nate’s reading corner)
- POÄNG children’s armchair
The verdict? We loved it so much that we got a second Inkagu mattress for our own home, and although I certainly wish we were sponsored to say this, we aren’t at all!
 |
| You can see how we hacked away (and had to rebuild) the wall here to access the children’s room, so that added to our cost (but was worth the splurge). Also featured: the full-length laminated wardrobe without any ugly joint lines, thanks to EDL, and our awesome $600 Inkagu mattress! I highly recommend it! |
11. Go for energy-efficient appliances.
There are some things that you DON’T want to save on, because a penny saved now could easily be dollars spent in the future to repair or upkeep. As a result, we bought the following energy-efficient appliances:
- Mitsubishi Electric air conditioning units
- LG washing machine
- Hitachi refrigerator
I’ll update in a subsequent post on our total bill, so do keep a lookout for that!
For those of you embarking on your own renovation journey soon (especially if you’re also renovating a resale HDB like we did), I hope this post was useful to you guys!


1 comment
Congrats!!
Renovation is indeed a nightmare if we dont hav a good & helpful ID to guide us along.
I wrote an article "Home renovation regrets that costs you thousands of dollars" last yr and i hope your readers will find it useful too:
https://compoundingdividendxdividend.blogspot.com/2019/05/home-renovation-regrets-that-costs-you.html?m=1
Merry xmas & enjoy your new home 😉
Comments are closed.